If you are using Opencart QuickBooks Connector and you want to create a live production QuickBooks account, then you need to follow these steps:
**Note: For using a production account your site must have SSL.
STEP 1: Go to developer.intuit.com and create an account there.
STEP 2: Now, select your app and then go to your keys section and scroll to the bottom. Here, you have to complete your account profile and provide EULA & privacy policy URLs in Settings.

STEP 3: Click on Complete your account profile option and another page will open up. Enter all the information on this page and select the QuickBooks platform as QuickBooks Online and lastly save the configuration.

STEP 4: Now, complete the 2nd point – Provide EULA & Privacy Policy URLs in Settings. Now, after taping the save button in the above step, you need to navigate to the settings section. Here, enter the links under the Terms of Service links and then save the configuration by clicking the save button.

STEP 5: Now, go to the keys section to see the generated Production keys – Client Id and Client Secret.
Note: You can add the redirect URL as – siteurl/index.php?route=account/validate OAuth Site URL is your website name. Example – https://webkul.com/ index.php.
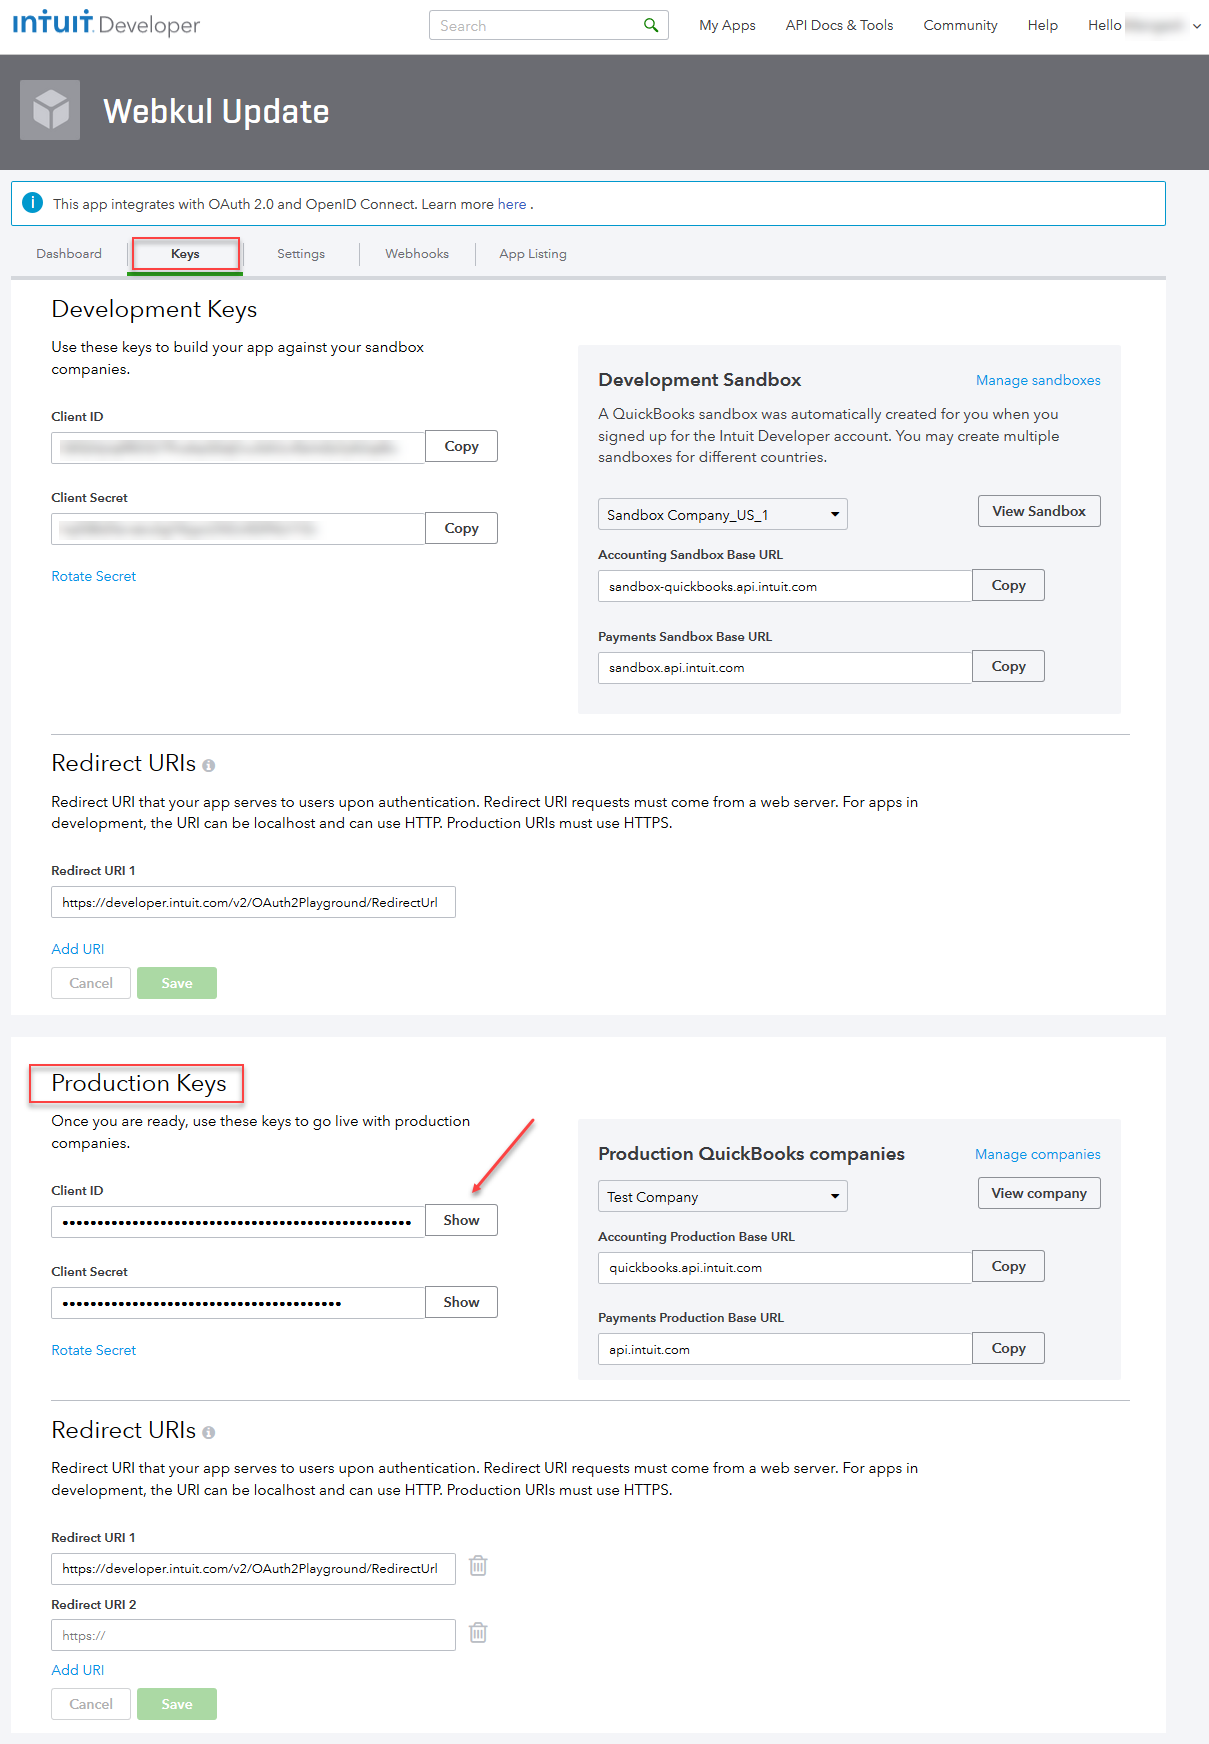
STEP 6: Now, Go to your Production keys section and to its right click on Manage Companies.

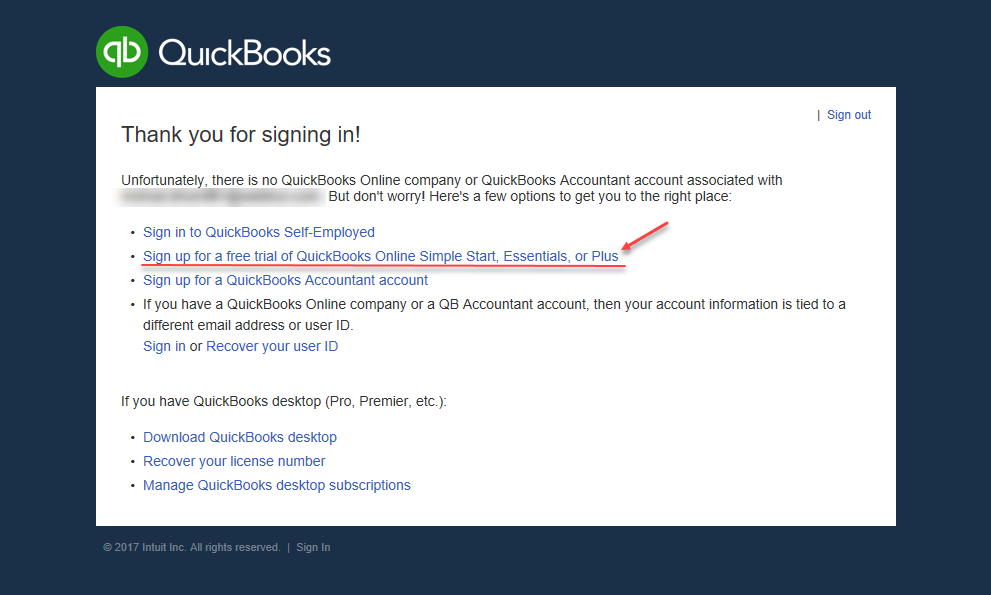
STEP 7: This brings up another page. Here, click on the second link.
- STEP 8: Clicking the Link in the above step will bring the section to choose a plan. Select a plan according to your needs but the one that provides the below-stated permissions –
- Customer
- Product(Item)
- Sales Receipt(Orders)
- Account
- Choose a Plan

STEP 9: We have selected the free trial account. Selecting a paid account will also bring up the same page to confirm your account. Here, click Yes, that’s correct button.

STEP 10: Now, a pop-up will appear. Make a selection as per need to proceed further.

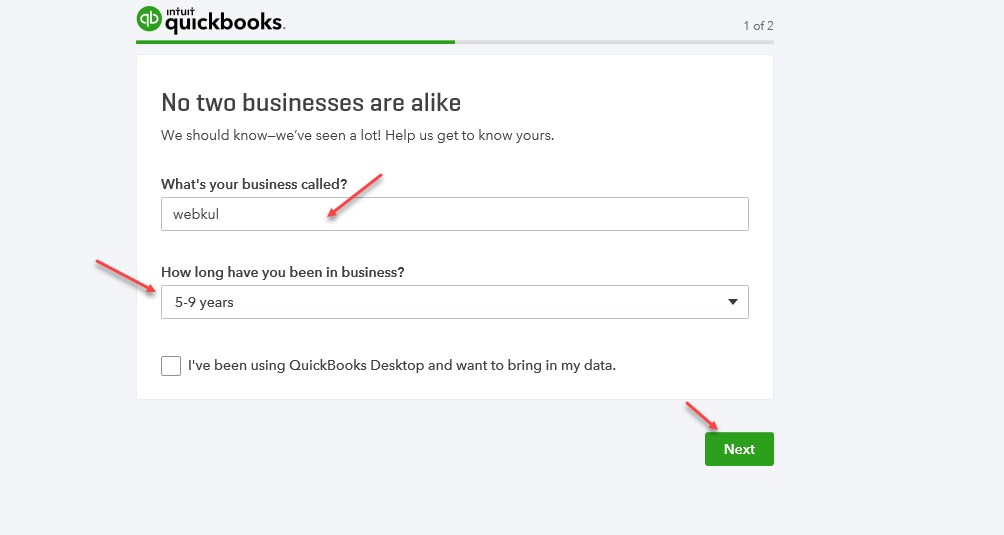
STEP 11: The section that comes up, enter your company name and choose an option for how long have you been in business and then click Next.
STEP 12: Select all under “What would you like to do in QuickBooks” and click All Set.

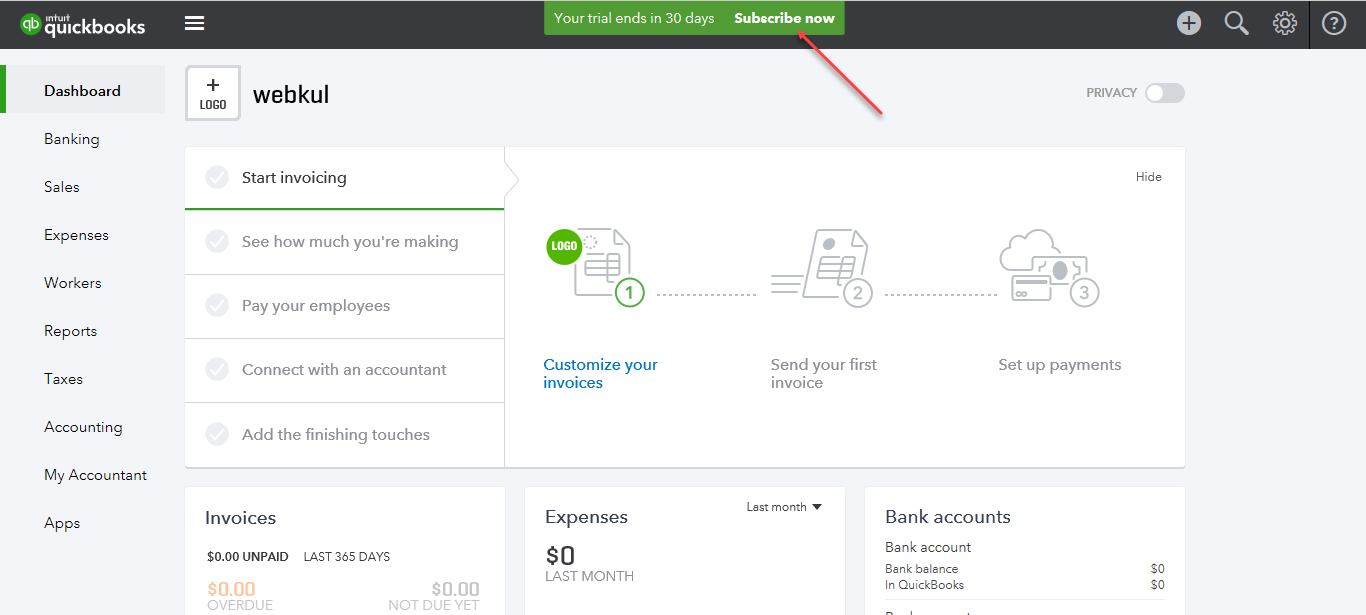
STEP 13: Lastly, keep using the trial(30 Days) or click the Subscribe now link to continue using the services.
Please do contact us for any further queries or requirements. You can also check our Opencart Extensions for additional features.
Be the first to comment.