A KYC document allows the marketplace store owner to obtain information about the identity and address of the vendors.
This will make sure that the vendor’s identity is justified which helps in maintaining a trust factor between the store owner & store vendors.
As in the default Magento 2, there is no option available by which you can add length to your vendor/seller registration page.
But by using Magento2 Vendor Attribute Manager Marketplace Add-On & Magento 2 Multi Step Vendor Signup Add-on the admin can easily create additional vendor attributes that will be displayed on the vendor registration page.
Now let see how it works, after the installation of Vendor Attribute Manager extension & configuration, the admin can easily create the vendor custom attributes.
Vendors will fill information in these attributes and can update these attributes at their vendor profile page. These attributes will be visible to the admin in the backend.
Workflow
Now let see how the admin can create vendor custom attribute for the KYC document so that the vendor can upload his document in a media format.
However, there are various inputs types provided from which the admin can choose from.
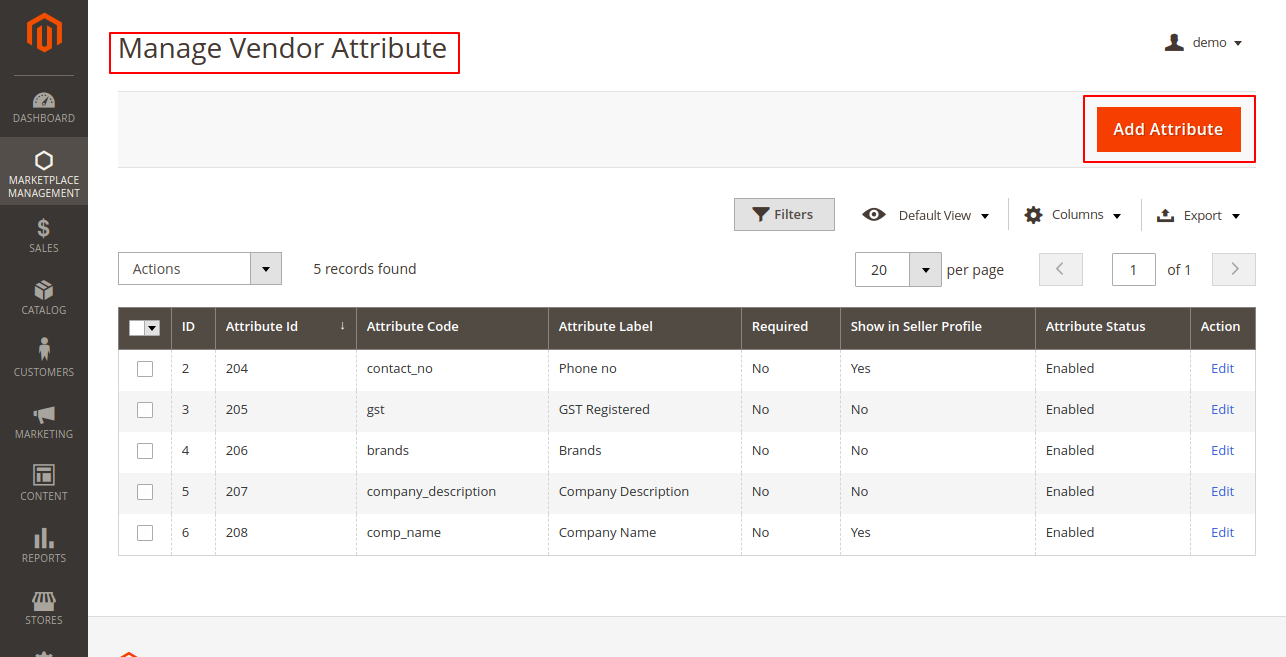
After the successful installation of the Magento2 Marketplace Vendor Attribute Manager extension, the Admin can find two tabs.
Vendor Attribute Manager & Vendor Attribute Group Manager (create groups and then put the vendor attributes into the created groups) under Marketplace Management.

Clicking the Vendor Attribute Manager tab will bring up a new page. Now click on the “Add Attribute” button to add a new custom attribute for the seller as shown below in the snapshot.
Now the “New Vendor Attribute” page will open as shown below in the snapshot.
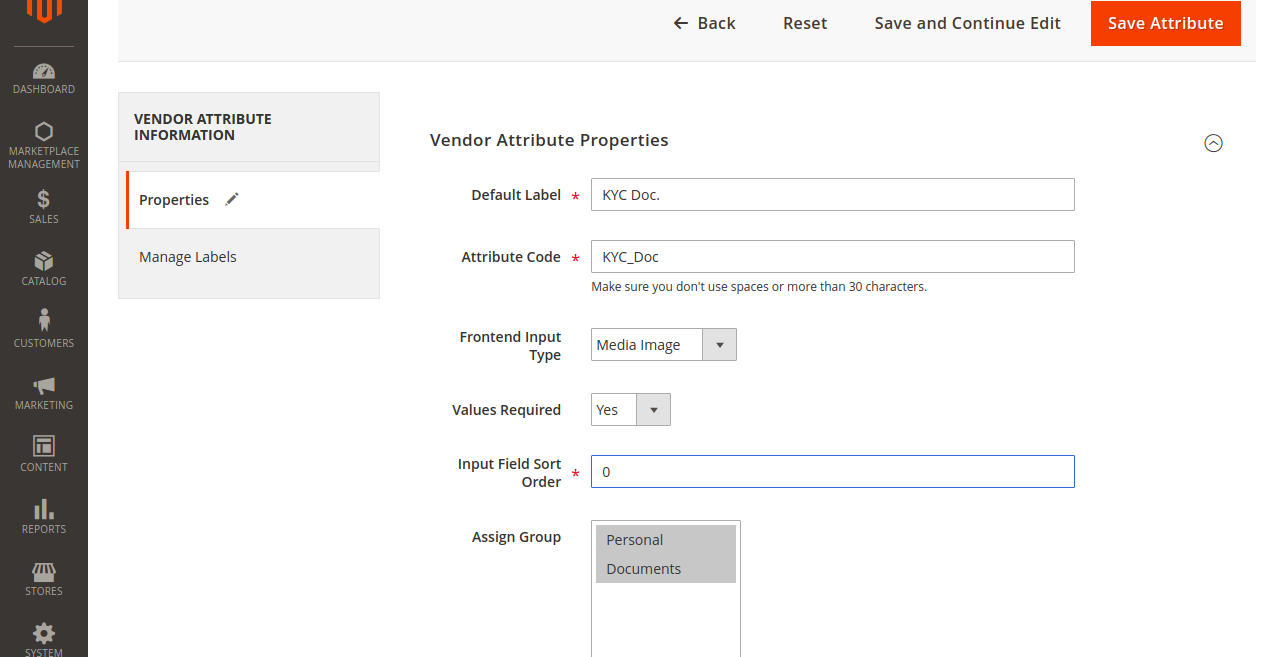
On this page, the admin will set the –
- Default label(set the default label for the vendor attribute).
- Attribute Code(set the attribute code without spaces).
- Frontend Input Type(select the input type for the attribute, here select Media Image).
- Allowed Extensions(select the allowed extension types for the Media Image).
- Values Required(select yes to make this option as Required).
- Input field Sort Order(set the sort order for the vendor attribute in the list of available attributes).
- Attribute Used For( Whether for seller only, for the customer or for both )
Now go to the “Manage Label” option under Vendor Attribute Information to set the default label that will be visible to the vendors at the front end. After setting the default label, click the save button to save the new attribute.

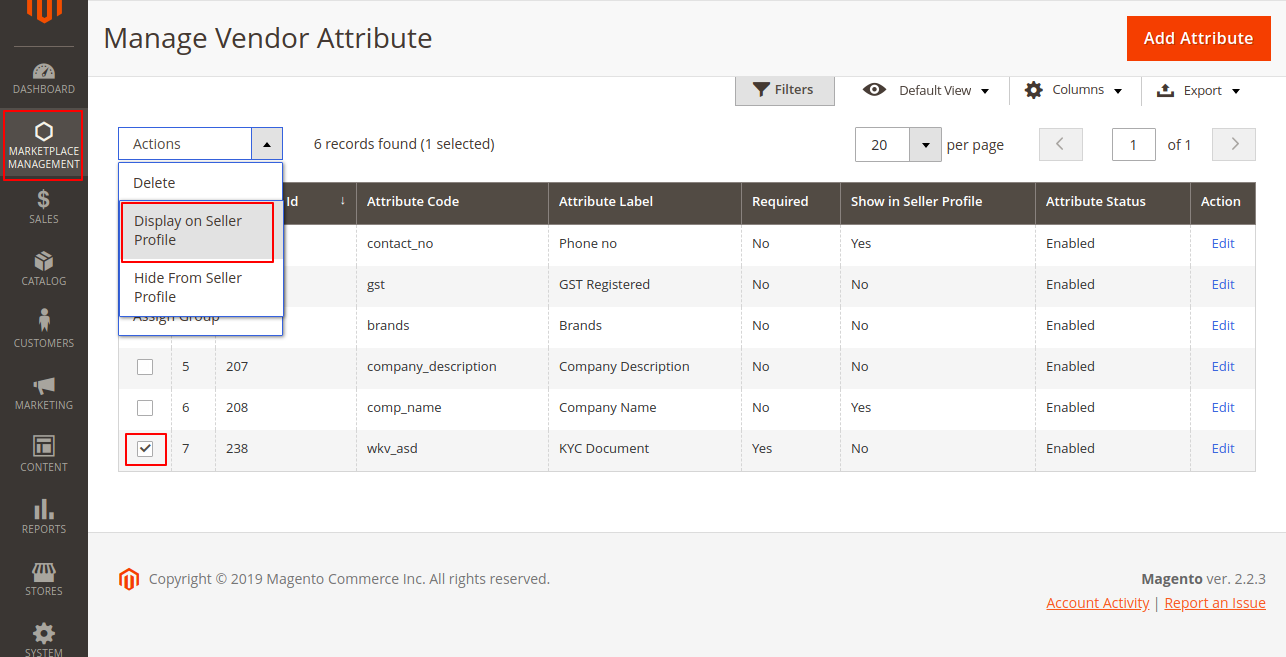
After saving the attribute you will be redirected back to the attribute list. Here select the attribute that you want to display on the seller registration page.
And from the dropdown select – Manage Display Fields to Show or Hide the attribute at the seller profile as shown below in the snapshot.
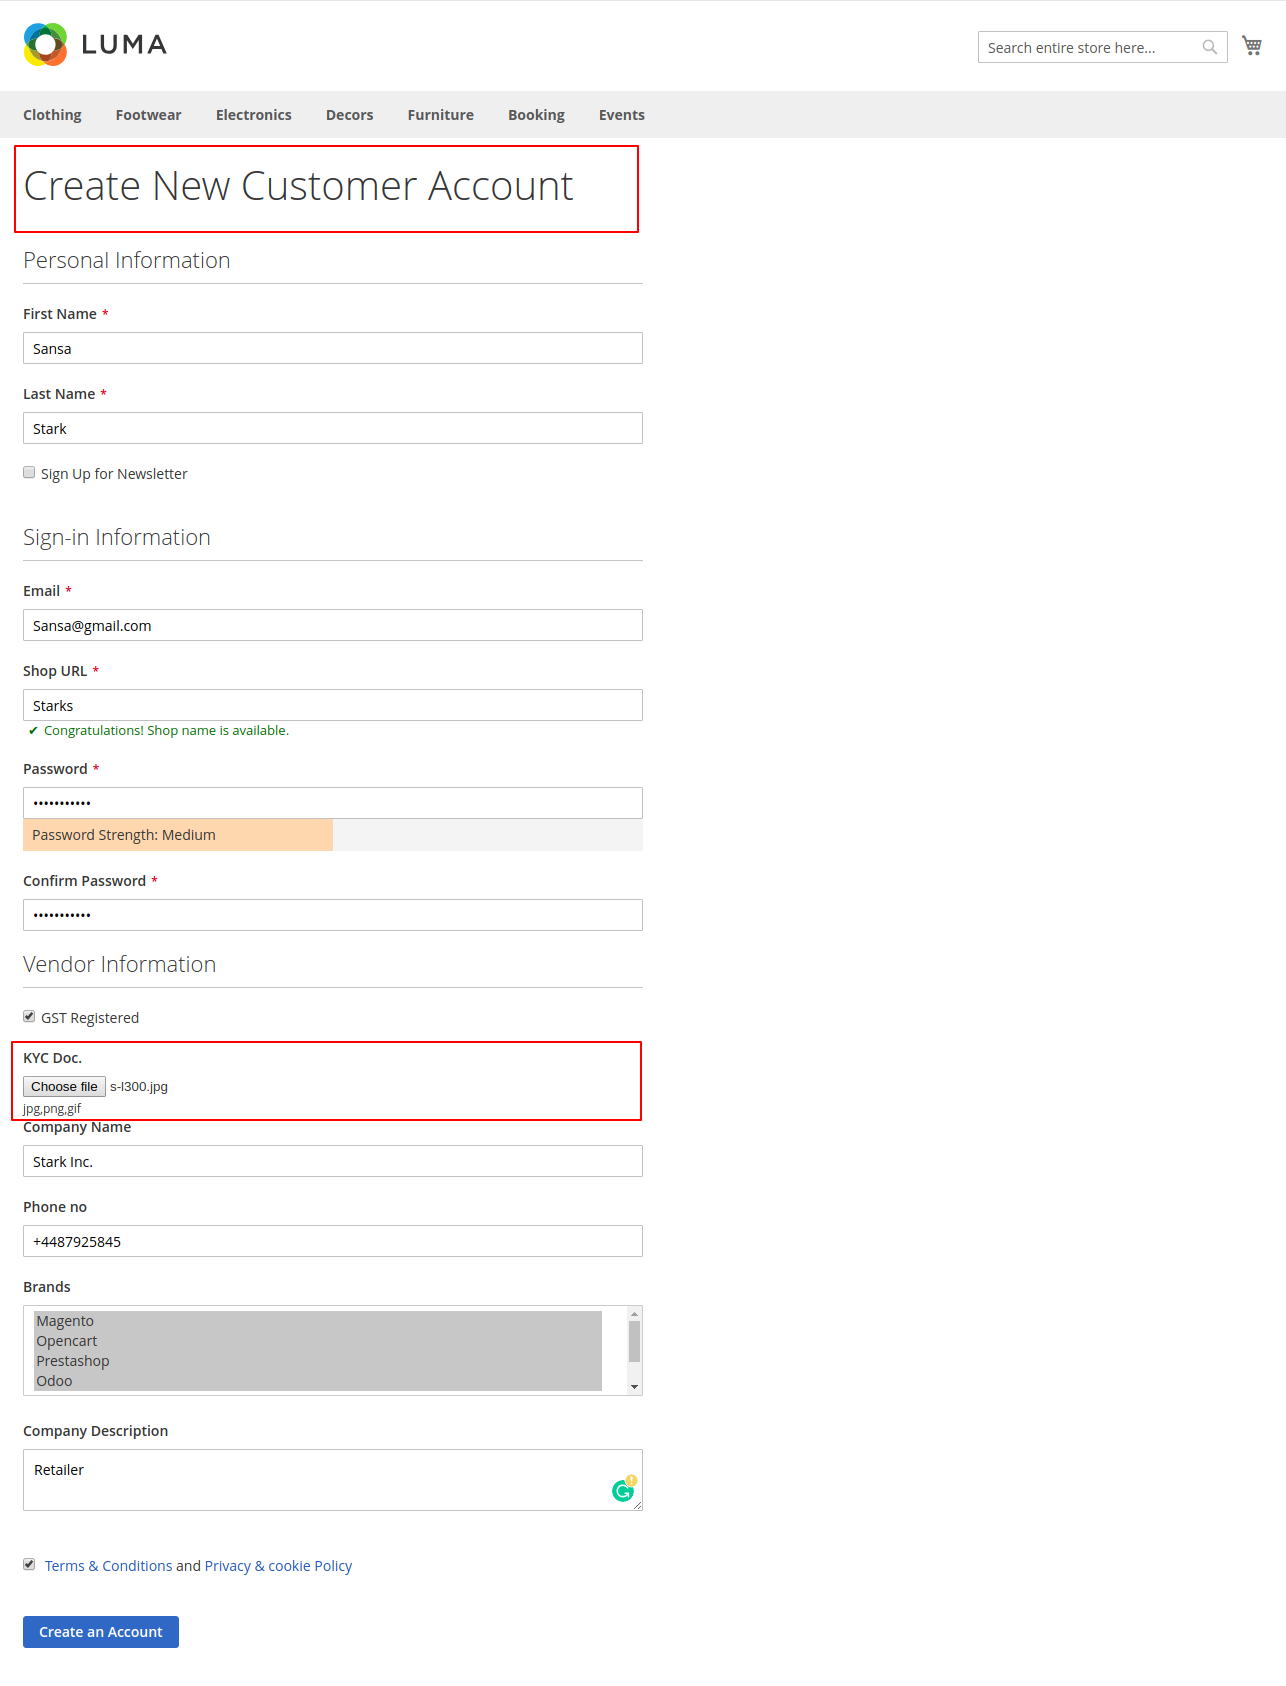
Seller Registration
On the frontend when a seller goes for the registration he will be able to see the additional attribute for the KYC document as shown below in the snapshot.
KYC Details visible at Admin’s end
After the seller has registered, the KYC details will be visible to the admin in the admin backend. The admin will navigate to Marketplace Management -> Manage Seller.
Now the admin can view all the sellers registered on the marketplace. Now from here, the admin can just click on the specific seller name in order to view the details.
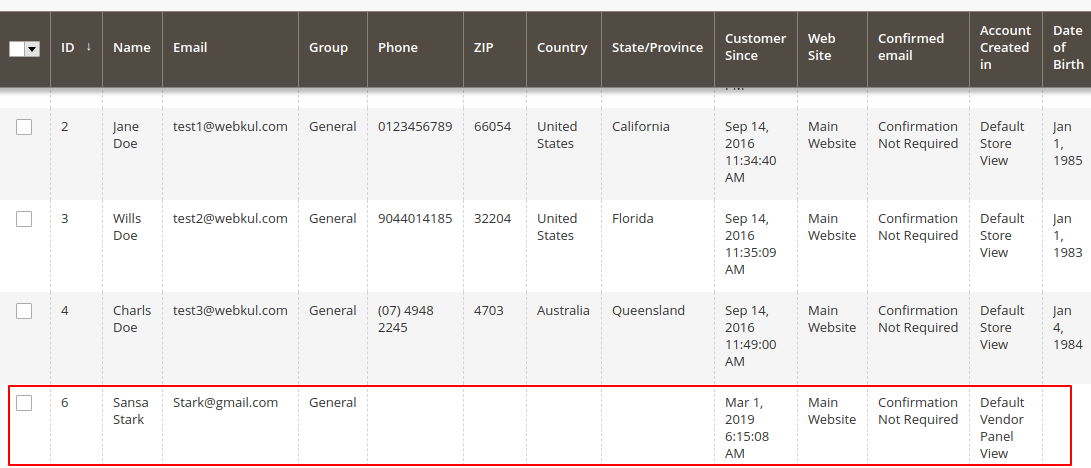
The page that opens up, click on the name of the seller. This brings up the Customer Information page here you can view and manage the seller information.

Here under the Vendor Attribute Fields menu option, the admin will find the KYC document uploaded by the seller.
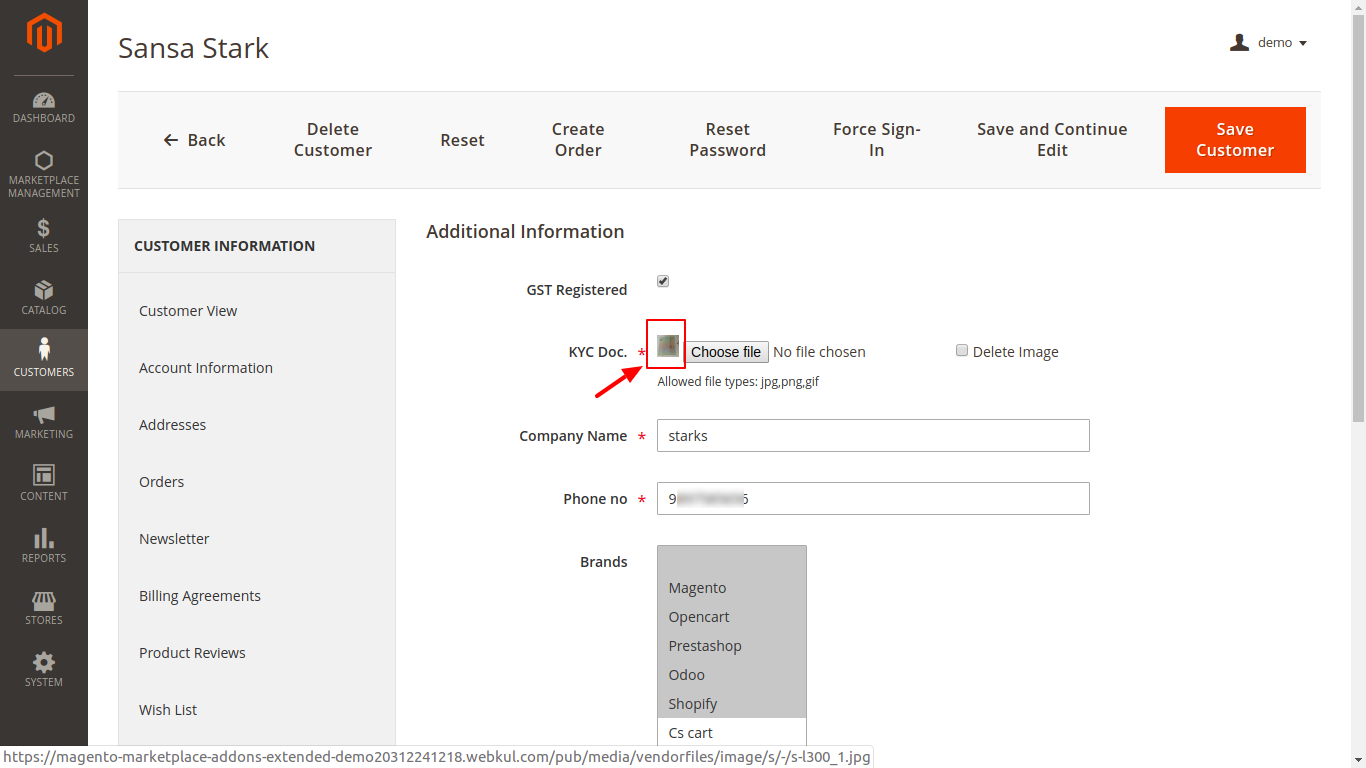
The document will open up in a new window like shown in the below snapshot. From here the admin can save it and maintain the specific seller record.

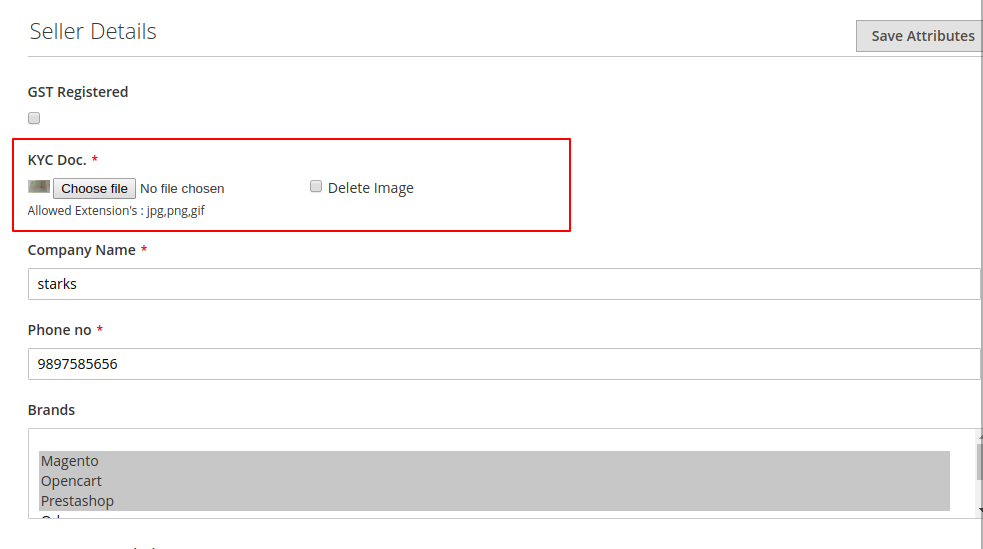
KYC Details visible at Seller end
If sellers want to view the KYC details provided by them. The seller from his marketplace dashboard will navigate to the seller profile and under this will find the uploaded KYC document under seller details.
Different options by we can extend the vendor/seller registration page?
For your Magento 2 store, you can add length to the default vendor/seller registration page by using our above discussed Magento 2 Vendor Attribute Manager Marketplace Add-On or can go for Magento 2 Multi Step Vendor Signup Add-on.
As under Magento 2 Vendor Attribute Manager Marketplace Add-On, the registration form created by the admin is a single page vendor registration form with the desired number of custom fields shown in the below image.

But by using the Magento 2 Multi Step Vendor Signup Add-on, the vendor can fill their information needed during the registration process in the multi-step vendor registration form.
By this add-on, you can acquire detailed information about your vendors like their personal info, bank details, their digital documents like Passport, PAN Card, ID proof etc.
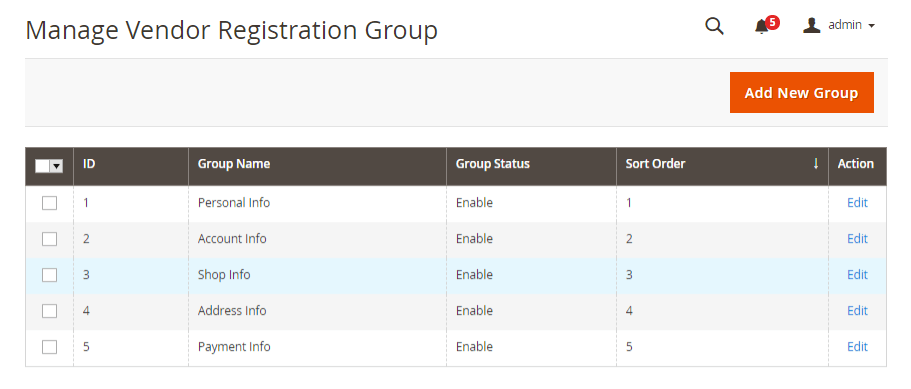
All these requirements can be added by the vendors on the vendor sign-up page in a very clean & tidy stepwise fashion.

The vendor/seller can easily navigate through the multiple steps during the registration process. Automated progress bar to guide the progress status of the form.

For more detailed information you can check the Live Demo and the User Guidefor Magento2 Vendor Attribute Manager Marketplace Add-On.
That’s all for How to add KYC document in Magento 2 Marketplace Multi-Vendor module.


Be the first to comment.