
Prestashop Marketplace Product Label facilitates the sellers to create custom labels and add them on product images. Promote specific products by showcasing labels such as NEW, BESTSELLER, FREE SHIPPING, or inform customers regarding the stock availability with labels like IN STOCK, SOLD OUT, etc. The seller can add various labels to one product and align them anywhere on the product image. Also, sellers can create multiple rules based on conditions like price range, featured products, etc to mass-apply labels to the products.
For installing this module, you need to install Prestashop Advanced Multi Vendor Marketplace module first.
Features of Prestashop Marketplace Product Label
- Allow sellers to create labels and assign them to their products.
- Display labels on several pages like the product, category, brand, and supplier pages.
- Sellers can add labels in text and image formats. Also, sellers can use the Google material icon for the label.
- Configure the label dimensions to display on the store pages.
- Sellers can also upload their own customized images as labels for the products.
- Configure the date range for the display of the labels.
- Select the display position of labels on the product image.
- Sellers can select the customer groups to which they want to show the labels.
- Customize the label display (text/background color, font size/family) as per requirement.
- Assign labels to individual products or apply the bulk action to assign labels to multiple products at once.
- 9 pre-made label templates available to choose from.
- Create rules by setting different conditions for the display of labels.
- Admin can also add the labels on behalf of the sellers.
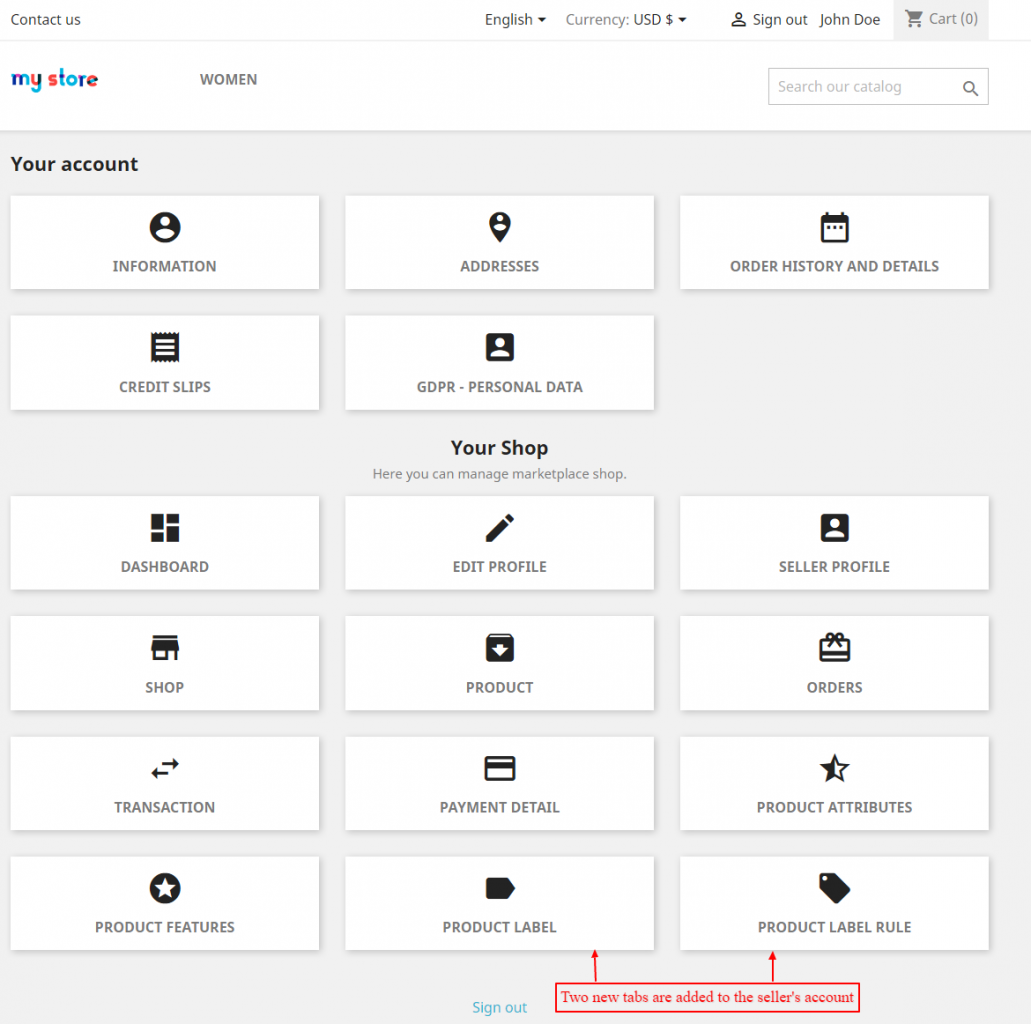
Post-installation, two new tabs “Product Label” and “Product Label Rule” get available on the seller’s account. From these tabs, a seller can add & manage product labels and product label rules.
Click on “Add LABEL” button to create a new label.

Icon Type: From this field, a seller can select the type of label. The seller can choose to add an image, text, or Google material icon for the label. If a seller selects the “image” option, then a field “Label Icon” appears on the page. On clicking the “CHOOSE LABEL ICON” button, a popup appears on the screen with ready-made icons. The seller can choose the icon as per need. Also, the seller can choose to upload own label.

- Label Priority: A seller can set the label priority in case he has applied multiple labels to the product.
- Label Start/End Date: Seller can select the date range for which the label will display on the product image.
- Position: Select the display position of label on the product image. Seller can select the multiple positions the label will show only on the available position. Also, seller can preview the label position.
- Label Pages: Seller can select the pages where he wants to display the label and configure the label dimensions accordingly.
- Group Access: From here, the seller can choose to which group(s) of customers he wants to show the label.
- Display Label With Content: Seller can choose to display the content with label on the product page. Also, Seller can customize the content by setting it’s text & background color and font size & family.
Similarly, a seller can add labels using “text label” and “Google material icon” as icon type.


After creating the labels, a seller can view it under “Product Labels”.

Assign Label To Products
Post-installation, a new tab “Label” gets available on the “Update Product” product page. Under this tab, a seller can apply labels to the product.

Front End View
All the labels assigned by the seller to a product will display on the product image as shown below:

Label Bulk Action
A seller can choose to assign labels to multiple products at once. Under “Product” tab, a seller can select the products on which he wants to assign the labels. After selecting the products, click on “ASSIGN BULK LABEL” button.

On clicking the button, a popup appears on screen from where seller can select the labels that he wants to assign to the products.

Product Label Rule
Seller can add product label rules to apply labels on multiple products. While adding a rule, the seller can set the condition for the display of labels. Seller can create the rule based on the following criteria:
- Price Rule
- Featured Products
- New Product
- Online only
- On sale
- Free Shipping
If selected “Feature Products” label rule type, then the assigned label will be displayed on all the products that fall under the featured product category.

As per the rule created by a seller, the “Sale” label will appear on all the seller’s feature products.

Lets’s create label rule for price range.

A seller can define the price range and the selected label will appear on the products that fall in the specified price range.
The label “NEW ARRIVAL” will display for the product as the product price falls under range defined by the seller while creating the rule. Similarly, a seller can create rule for several other conditions to display the labels.