

With the help of the WooCommerce Marketplace Shopify Connector Document, the seller can integrate their WooCommerce marketplace store with the Shopify marketplace store and then synchronize products, categories, and orders between the platforms.
The sellers can connect multiple Shopify accounts to exchange and synchronize the data between Shopify and WooCommerce.
After the successful installation WooCommerce Marketplace Shopify Connector Document, the admin configures the module and can view the seller’s Shopify account list by navigating through Marketplace > MP Shopify Connector.

Also, the admin can delete any seller from the Shopify Account by clicking on the Delete option as shown in the below image.

After placing an order on Shopify, the admin adds the tracking order and view the real-time tracking details of the order such as tracking Company name, Tracking Number, and Tracking URL under WooCommerce > Orders.

The seller can easily configure the module from the WooCommerce seller panel.
Also, the seller can add multiple Shopify stores from here.

The seller can click on the Add Account button to add a new Shopify account then enter the Store Name, Token, and Domain Name.
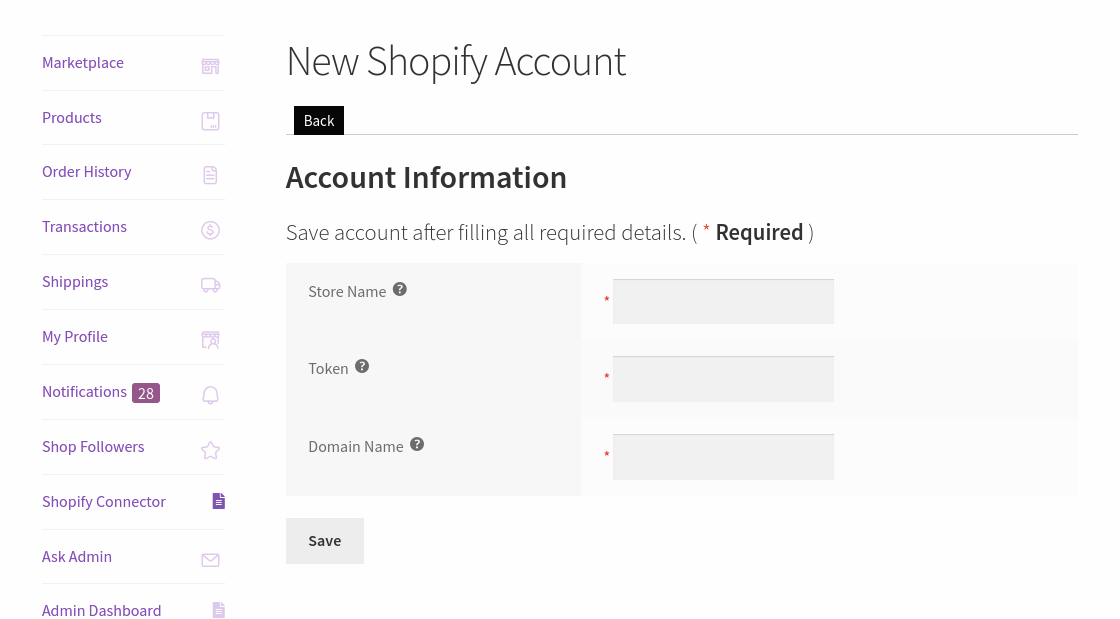
Here, the seller can enter the:
To get the API credential the seller needs to generate the Shopify API credential first using the Shopify account.
The seller can visit the Shopify store for which the seller wants to connect and sync the WooCommerce store then click on the App menu and click on develop an app for your store.

After the selection develop an app for your store and then click on Create an app.

Please fill in the required credentials i.e.App name and click on Create an App.

Afterward, create a successful app and then go to the configuration and click on the configure for Admin API Integration.

Also, it should have Read and Write API permission for the following:
After successfully, fill in all the required permissions and then click on the Save button.

Afterward, go to the API credentials and click on the Install App button.

By clicking on the Reveal token once and getting the token key successfully.
Note- This token key is available only once, please copy and save your seller API token in a secure place.
The seller can copy the generated Token key and then paste these credentials into the WooCommerce store.
From the WooCommerce Shopify Connector, the seller can manage Account Details, General Configuration, Map categories, Import Products, Import orders, and Export Products.
The seller can enter the Shopify store name, Token, and domain name here.


While configuring the module in the GENERAL SETTINGS the seller can select.

Thus, after the General Settings, the seller can configure the EXPORT ORDER SETTINGS.

At last, the admin can configure the SHOPIFY AUTO-SYNCING SETTINGS.


To manage the product sync like product update and product delete. The seller will have to configure the webhooks on their Shopify account.
Delete the product : {Site URL}?wkmpshopify=wkmpshopify_delete_product
Update the product : {Site URL}?wkmpshopify=wkmpshopify_update_product
Update The Order : {Site URL}?wkmpshopify=wkmpshopify_order_update
Now from the Shopify account, navigate to Settings, Notifications

Here, the admin can create the Webhooks and add the URL for Product Deletion, Product Update, and Update the Order.

Now select the Product deletion option from the Event list and paste the server URL with the postfix URL wk_woo_shopify=wk_shopify_delete_product as shown in the image below –

Choose the order update from the Event list, and paste the server URL with the postfix URL – wk_woo_shopify= wkmpshopify_order_update as shown in the image below –

Now, for the product update, select the product update from the event and paste the server URL along with the postfix URL – wk_woo_shopify=wk_shopify_update_product as shown in the image below –

After saving the Webhook, you can also view the event as shown in the image below –

The seller can click on the import category button to import the categories from the Shopify store.

The seller can see the process on the screen while importing the categories as shown in the image below-

After importing the Shopify category, the seller can select the WooCommerce store category, select the Shopify category, and then click on the Map Category button.

The selected category gets mapped with the Shopify marketplace category.
The seller can view the Store Category, Store Category Name, Shopify Category ID, Shopify Category Name, Published Date at Shopify, and Published Scope At Shopify. The seller can also delete and search for the categories from here.
The seller can click on the import products and then create the products of those imported products from Shopify to the WooCommerce store.

The process bar can be seen from the screen while importing the products from the Shopify as shown in the image below-

The seller can view all their Shopify products from the Shopify store.

After importing Shopify products, click on Create imported products to create the products on the WooCommerce Marketplace Store.

The seller can easily update the products by just clicking on the update option available in bulk mode.

Here, the admin can import the orders from Shopify.


Shopify Orders:

Then Shopify marketplace imported orders get created in the WooCommerce marketplace store and you can also see the Shopify Order numbers.

here, the seller can also view the store ID, order status, the order created date, and Shopify order ID, and Shopify order number as well.
The seller can also delete the order by selecting single or multiple orders.
The seller can easily export WooCommerce products to the Shopify store.

Also, the seller can export the products in bulk.
Note: The Export/Import feature will work for every product type except for group products.

This module allows the seller to Export Orders to the Shopify store by clicking on the Export button of the particular order or in bulk mode.

Also, the seller exports the order for those products that are imported to the WooCommerce store from the Shopify store.
This export feature for the orders will work only for those orders whose products are imported from the Shopify web store to the WooCommerce web store.
The seller can manage the Price Rule from the seller panel easily. The seller not only can create but also edit the existing price rules.
Note: if the price rule is applied to imported products then it will work in a reverse manner for the exported product.

To create a new price rule, the seller can click on the Add New Price Rule and fill in the required details.

Here, the seller can –
– The seller can set the maximum price for the rule.
– Set the operation type of the rule i.e. Percentage or Fixed.
– The operation of the price rule is managed from the operation. The seller can decide if the price of the product will be increased or decreased according to the rule applied.
– The seller can set the price for the applied rule.
– Select the Shopify store on which the price rule will be applied.
Enable and disable the price rule.
Thus, that’s all for the WooCommerce Marketplace Shopify Connector. For any further queries/issues, contact us at HelpDesk Support.


